![]()
When the sun goes down, and it starts to get dark in your house, you might need to turn on a few lights to see. But wouldn’t it be more convenient if they could do so automatically? With photoresistor sensors and an Arduino, you can control lamps, blinds, or just about any other project based on the ambient lighting around you.
For this project, we’ll be focusing on photoresistors and how to incorporate them into your projects. A photoresistor is a type of resistor that changes its resistance level in response to the amount of light that hits it. While typical resistors impede the flow of electrons through a circuit at a constant level, photoresistors allow higher voltages to pass through a circuit when there’s more light hitting a sensor. In contrast, when there’s less light in an area, the resistance increases.
This resistance can then be read by the Arduino’s analog pins to return a value between 0 and 1023. With this information, you can make your project respond differently to bright daylight, waning dusk, or pure night. You could use this to open your blinds when it’s bright outside or turn on a lamp when it gets dark.

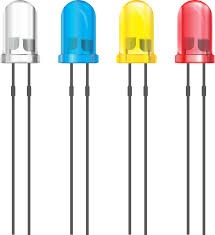
Photoresistors are small, cheap, and they often come in beginner’s kits and packs of other sensors. If you’ve bought an electronics kit, you’ve probably got one or two sitting around. To demonstrate how they work, we’ll control two LEDs, turning one on when there’s light out and another when it’s dark.
For this project, you won’t need much that doesn’t come in a standard electronics kit. However, it’s worth keeping in mind any larger projects that you might want to control using your photoresistor. For example, if you want to control blinds, you’ll need some servos, whereas if you’re controlling a lamp, you’ll need a relay. For now, we’ll focus solely on how to use the sensor itself.
| Arduino Uno |  |
| Arduino IDE |  |
| Two LEDs
Ideally, different colours! |
 |
 |
|
|
One 220 ohm resistor To help further reduce resistance running through the photoresistor, bringing down its value down to a more usable level
|
 |
|
Two 100 ohm resistors To help avoid burning out the LEDS
|
You’ll also need to source a USB Cable; if you haven’t got one lying around that is!
It’ll also be helpful to have a breadboard handy for prototyping this project. Once again, all of these materials can usually be found in any starter electronics kit, so take stock of what you already have.
For this project, we’ll use one pin on the Arduino to read the photoresistor, and two pins to control two separate LEDs. When the photoresistor detects light above a certain threshold, we’ll turn on one LED. When it falls below that threshold, we’ll switch on the other. With that in mind, here’s the full code.
int redLED = 7;
int blueLED = 8;
int photoresistorPIN = A0;
int lightValue = 0;
void setup() {
pinMode(redLED, OUTPUT);
pinMode(blueLED,OUTPUT);
Serial.begin(9600);
}
void loop(){
lightValue = analogRead(photoresistorPIN);
Serial.println(“Light value: “);
Serial.println(lightValue);
if(lightValue < 50){
digitalWrite(redLED, HIGH);
}
else{
digitalWrite(blueLED, HIGH);
}
delay(200);
digitalWrite(redLED, LOW);
digitalWrite(blueLED, LOW);
}
There are a few parts of this code to explain, so let’s start with the variables we’re setting up.
int redLED = 7;
int blueLED = 8;
int photoresistorPIN = A0;
int lightValue = 0;
Here, we’ll assign the red LED to pin 7 and the blue LED to pin 8. These can be assigned to any of the digital pins on the Arduino. Next, we’ll assign the photoresistor to A0. This pin must be assigned to one of the six analog pins, as it needs to read the analog value coming from the photoresistor.
Finally, we’ll create a variable called lightValue to store the value that the photoresistor returns.
void setup() {
pinMode(redLED, OUTPUT);
pinMode(blueLED,OUTPUT);
Serial.begin(9600);
}
Inside the setup() section, the first two lines assign both the red and blue LED pins to be output pins.
We’ll also initialize the serial monitor, which allows us to see what value the photoresistor is returning. This can be helpful when determining which threshold to set for switching between one LED or another.
Depending on how much ambient light there is in the room where you set up your project, you may need to adjust this value based on your needs.
void loop(){
lightValue = analogRead(photoresistorPIN);
Serial.println(“Light value: “);
Serial.println(lightValue);
if(lightValue < 50){
digitalWrite(redLED, HIGH);
}
else{
digitalWrite(blueLED, HIGH);
}
delay(200);
digitalWrite(redLED, LOW);
digitalWrite(blueLED, LOW);
}
Inside the loop() section, the first line will read the analog value from the photoresistor and assign it to the lightValue variable. We’ll then print it to the serial monitor immediately.
Next, the part of the loop will activate the red LED if the light sensor reads a value lower than 50, and turn on the blue LED if it’s higher. If the value of 50 is too low for your environment and the red light always stays on, use the serial monitor to determine a good value for your project.
Now that you understand the coding go ahead and upload it to your Arduino. Then, we’ll set up the wiring – something that’s fortunately, extremely simple and easy to add to your other projects. To get the wiring set up, follow these steps:
● Connect the long end of the blue LED to pin 8 on the Arduino. Connect the short end of the LED to a 100-ohm resistor, then connect the other end of this resistor to GND.
● Repeat the previous step for the red LED, connecting the LED to pin 7 on the Arduino.
● Connect one end of the photoresistor to 5V. Connect the other end of the photoresistor to pin A0. Additionally, add a 220-ohm resistor to the second end of the photoresistor, and connect it to GND.
● Use the positive and negative rails on your breadboard to connect the previous circuits if you need to.
Once all your wiring is connected, you can plug your Arduino into a power source to turn the project on. Wave your hand over the photoresistor to switch from the blue LED to the red one. If either LED stays on continuously, try adjusting the value in the if() statement in the sketch until the sensor works the way you want it to. When you’re happy, you’re done!


