![]()
RFID tags are small, rewritable chips that can store small amounts of data like names, addresses, product information, and more. They can take the form of keychains and cards, or they can even be implanted into pets or people. If you want to learn how they work or add them to your own project, an RFID reader and writer is a cheap component that you can use. This guide will show you how to use one to write to your own RFID tag.

RFID reader/writer sensors use short-range, low-power radio waves to transmit data from tags, where the data is stored, into the electronic device the sensor is connected to. In this case, we’re going to use an Arduino as the device by adding an RFID sensor. Specifically, we’ll write some basic information to an RFID tag.
To do this, we’ll be making use of this library for reading and writing to RFID tags. Since using RFID tags are a bit more complex than, say, turning an LED on or off, we’ll rely on pre-existing sketches that you can integrate into your own projects. The pre-written functions that these sketches provide will let you more easily integrate them into your other projects.
To use the library, first download the .zip file from the Github page above. Next, open up your Arduino IDE, navigate to Sketch > Include Library > Add .ZIP Library… and choose the library you just downloaded. Not only will this make it possible to include the RFID library in your sketches, but you’ll also get a collection of example sketches, which we’ll need later on.
For this project, we’re only going to be writing to an RFID tag. However, keep in mind as we go through the guide how you can use this to extend your other projects. Perhaps you can trigger a lock to unlock when you show the reader a tag with the correct data on it, for example. For this basic project, though, here’s what you’ll need:
| Arduino |  |
| RFID sensor (preferably an MFRC-522) |  |
| RFID tags |  |
| Breadboard & wiring |  |
| Arduino IDE |  |
| USB Cable |  |
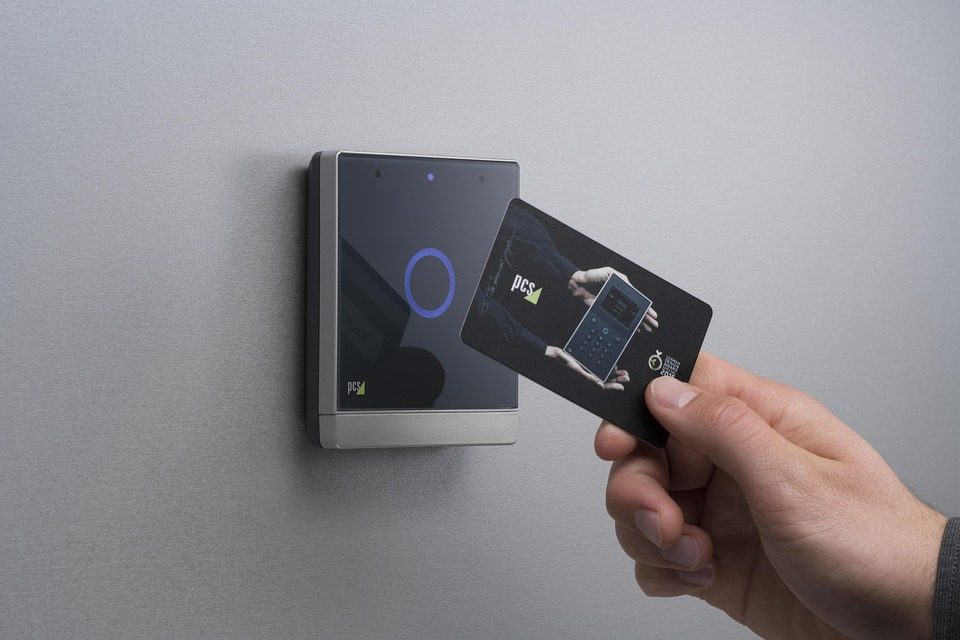
Since RFID chips are very small, the tag you use can come in almost any form. Two of the most common types of RFID chips – often coming in kits or with sensors – are small round keychains or flat cards about the size of a credit card. Having said that, whatever tag you have should work.
If you installed the library as instructed above, the following sketch should be available in your example book under File > Examples > MFRC522 > rfid_write_personal_data. Select it in your example book, or copy the code below:
/*
* Write personal data of a MIFARE RFID card using a RFID-RC522 reader
* Uses MFRC522 – Library to use ARDUINO RFID MODULE KIT 13.56 MHZ WITH TAGS SPI W AND R BY COOQROBOT.
* —————————————————————————————–
* MFRC522 Arduino Arduino Arduino Arduino Arduino
* Reader/PCD Uno/101 Mega Nano v3 Leonardo/Micro Pro Micro
* Signal Pin Pin Pin Pin Pin Pin
* —————————————————————————————–
* RST/Reset RST 9 5 D9 RESET/ICSP-5 RST
* SPI SS SDA(SS) 10 53 D10 10 10
* SPI MOSI MOSI 11 / ICSP-4 51 D11 ICSP-4 16
* SPI MISO MISO 12 / ICSP-1 50 D12 ICSP-1 14
* SPI SCK SCK 13 / ICSP-3 52 D13 ICSP-3 15
*
* Hardware required:
* Arduino
* PCD (Proximity Coupling Device): NXP MFRC522 Contactless Reader IC
* PICC (Proximity Integrated Circuit Card): A card or tag using the ISO 14443A interface, eg Mifare or NTAG203.
* The reader can be found on eBay for around 5 dollars. Search for “mf-rc522” on ebay.com.
*/
#include
#include
#define RST_PIN 9 // Configurable, see typical pin layout above
#define SS_PIN 10 // Configurable, see typical pin layout above
MFRC522 mfrc522(SS_PIN, RST_PIN); // Create MFRC522 instance
void setup() {
Serial.begin(9600); // Initialize serial communications with the PC
SPI.begin(); // Init SPI bus
mfrc522.PCD_Init(); // Init MFRC522 card
Serial.println(F(“Write personal data on a MIFARE PICC “));
}
void loop() {
// Prepare key – all keys are set to FFFFFFFFFFFFh at chip delivery from the factory.
MFRC522::MIFARE_Key key;
for (byte i = 0; i < 6; i++) key.keyByte[i] = 0xFF;
// Reset the loop if no new card present on the sensor/reader. This saves the entire process when idle.
if ( ! mfrc522.PICC_IsNewCardPresent()) {
return;
}
// Select one of the cards
if ( ! mfrc522.PICC_ReadCardSerial()) {
return;
}
Serial.print(F(“Card UID:”)); //Dump UID
for (byte i = 0; i < mfrc522.uid.size; i++) {
Serial.print(mfrc522.uid.uidByte[i] < 0x10 ? ” 0″ : ” “);
Serial.print(mfrc522.uid.uidByte[i], HEX);
}
Serial.print(F(” PICC type: “)); // Dump PICC type
MFRC522::PICC_Type piccType = mfrc522.PICC_GetType(mfrc522.uid.sak);
Serial.println(mfrc522.PICC_GetTypeName(piccType));
byte buffer[34];
byte block;
MFRC522::StatusCode status;
byte len;
Serial.setTimeout(20000L) ; // wait until 20 seconds for input from serial
// Ask personal data: Family name
Serial.println(F(“Type Family name, ending with #”));
len = Serial.readBytesUntil(‘#’, (char *) buffer, 30) ; // read family name from serial
for (byte i = len; i < 30; i++) buffer[i] = ‘ ‘; // pad with spaces
block = 1;
//Serial.println(F(“Authenticating using key A…”));
status = mfrc522.PCD_Authenticate(MFRC522::PICC_CMD_MF_AUTH_KEY_A, block, &key, &(mfrc522.uid));
if (status != MFRC522::STATUS_OK) {
Serial.print(F(“PCD_Authenticate() failed: “));
Serial.println(mfrc522.GetStatusCodeName(status));
return;
}
else Serial.println(F(“PCD_Authenticate() success: “));
// Write block
status = mfrc522.MIFARE_Write(block, buffer, 16);
if (status != MFRC522::STATUS_OK) {
Serial.print(F(“MIFARE_Write() failed: “));
Serial.println(mfrc522.GetStatusCodeName(status));
return;
}
else Serial.println(F(“MIFARE_Write() success: “));
block = 2;
//Serial.println(F(“Authenticating using key A…”));
status = mfrc522.PCD_Authenticate(MFRC522::PICC_CMD_MF_AUTH_KEY_A, block, &key, &(mfrc522.uid));
if (status != MFRC522::STATUS_OK) {
Serial.print(F(“PCD_Authenticate() failed: “));
Serial.println(mfrc522.GetStatusCodeName(status));
return;
}
// Write block
status = mfrc522.MIFARE_Write(block, &buffer[16], 16);
if (status != MFRC522::STATUS_OK) {
Serial.print(F(“MIFARE_Write() failed: “));
Serial.println(mfrc522.GetStatusCodeName(status));
return;
}
else Serial.println(F(“MIFARE_Write() success: “));
// Ask personal data: First name
Serial.println(F(“Type First name, ending with #”));
len = Serial.readBytesUntil(‘#’, (char *) buffer, 20) ; // read first name from serial
for (byte i = len; i < 20; i++) buffer[i] = ‘ ‘; // pad with spaces
block = 4;
//Serial.println(F(“Authenticating using key A…”));
status = mfrc522.PCD_Authenticate(MFRC522::PICC_CMD_MF_AUTH_KEY_A, block, &key, &(mfrc522.uid));
if (status != MFRC522::STATUS_OK) {
Serial.print(F(“PCD_Authenticate() failed: “));
Serial.println(mfrc522.GetStatusCodeName(status));
return;
}
// Write block
status = mfrc522.MIFARE_Write(block, buffer, 16);
if (status != MFRC522::STATUS_OK) {
Serial.print(F(“MIFARE_Write() failed: “));
Serial.println(mfrc522.GetStatusCodeName(status));
return;
}
else Serial.println(F(“MIFARE_Write() success: “));
block = 5;
//Serial.println(F(“Authenticating using key A…”));
status = mfrc522.PCD_Authenticate(MFRC522::PICC_CMD_MF_AUTH_KEY_A, block, &key, &(mfrc522.uid));
if (status != MFRC522::STATUS_OK) {
Serial.print(F(“PCD_Authenticate() failed: “));
Serial.println(mfrc522.GetStatusCodeName(status));
return;
}
// Write block
status = mfrc522.MIFARE_Write(block, &buffer[16], 16);
if (status != MFRC522::STATUS_OK) {
Serial.print(F(“MIFARE_Write() failed: “));
Serial.println(mfrc522.GetStatusCodeName(status));
return;
}
else Serial.println(F(“MIFARE_Write() success: “));
Serial.println(” “);
mfrc522.PICC_HaltA(); // Halt PICC
mfrc522.PCD_StopCrypto1(); // Stop encryption on PCD
}
Upload this code, and (after wiring up your project as described below) you can immediately start writing data to your RFID tags.
One of the benefits of using libraries like this is that you can find portions of code already written, so you don’t have to reinvent the wheel for every project. This time, we’re not going to go through the code line-by-line. Instead, let’s talk a bit more about what the code does.
Data in RFID tags are stored in sections called sectors, which are further divided into blocks. Each block can contain a few bytes of data. The amount depends on the specific tag, but a common 1K passive tag (meaning a tag that can store 1 kilobyte of data) might, for example, have 16 sectors, each containing 4 blocks, with each block able to store up to 16 bytes of data.
This sketch is only going to store your first and last name, so it only needs one sector, but it will spread the data out over multiple blocks, since your names might take up more data than can fit in a single block (and for organizational convenience).
When you run the script, you’ll be asked to provide your family name, which will then be written to blocks on your RFID tag. Next, you’ll get a prompt to write your first name, which will be written to different blocks. For more info on how RFID blocks are organized and how to address them, check out this guide.
The wiring for your specific RFID reader will depend on the model you get, as many different iterations have the pins in a different order. Fortunately, the example code we included above lists which pins should go where depending on the board you’re using. Follow that guide for specifics.
As an example, if you were using an Arduino Uno and an MFRC-522 sensor, then you would do the following:
● Connect RST to pin 9
● Connect SDA (or SS) to pin 10
● Connect MOSI to pin 11
● Connect MISO to pin 12
● Connect SCK to pin 13
● Connect VCC to 5V
● Connect GND to GND
But, again, check which boards you’re using to make sure that you’re wired up correctly. Once your board is connected, turn on your Arduino while it’s connected via USB to your computer. Then, you can press an RFID card or keychain to the reader. Hold it there while entering data through the serial monitor.
The MFRC522 library also includes a built-in sketch for reading RFID data after you’ve written it. Now that you know how to write data, try uploading that sketch and using it to read the tag you’ve written to.
 3 Reasons Why Security Microchips Are Becoming Popular
 Make a Smart Automatic Pet Feeder with Arduino Uno
 An Arduino Plant Monitoring & Watering Device
 Make Your Own Arduino RFID Door Lock
 Smart Garden System using Arduino Create + ROHM Sensor Evaluation Kit
 How to Send IR Commands to Your Project with a Remote Control


