![]()
In the late 80s and early 90s, the Commodore Amiga was the dream computer. In a time of beeps and boops and screens with 16 colors, it brought jaw dropping graphics and sound.
The Acorn Archimedes might have outclassed the Amiga in raw power, but the software library was very limited. Eventually, the much more open ecosystem of the x86 PC meant the Amiga couldn’t compete on price, performance, or market share and software support.
But for a moment there, the Amiga was the ultimate home computer, with thousands of colours, 4 channels of sound, and a powerful Motorola 68000 CPU backed by 3 custom-built co-processors.

The common reason to revisit it is to play the games. It was originally designed purely as a gaming machine, although it didn’t take long to become a full computer. Many of the seminal games of the era were coded for the Amiga first, while other platforms received a port of lesser quality.
The Amiga wasn’t just for games though. It has a huge historical value. There is a fair argument that Deluxe Paint is the real beginning of professional graphic art and design on a home computer – the Mac was still monochrome at this point. Also of particular interest is the Amiga demo scene: a community of hobbyists who created software demonstrations of artistic, musical and programming skill.
If all this has piqued your interest, then you’re in luck! It’s now easy to visit this world using a Raspberry Pi! You can use just about any Pi for this project and it’ll run, but for good performance a Raspberry Pi 3 or 4 is preferable.
At first, emulating the Amiga on the Raspberry Pi looks bewildering. There are so many choices to navigate.
There’s about a dozen different models of Amiga to emulate, which could be configured and upgraded in different ways, and there is a range of software to emulate them.
In practice, the low-cost Amiga 500 was the top seller and so was the target for most developers, especially those writing games.
On the Raspberry Pi, the standout choice of emulator is Amiberry, which is optimised for the ARM processor. Amiberry lets you tweak all the options if you want to; it’s also set up with a range of default configurations that save you from having to.
Some of the best programs for the Amiga have always been free. This is true of the demo scene, and of a number of popular applications like ProTracker.
Even better, many of the rights holders for commercial software have generously given permission for hobbyists. You can find libraries of these at websites like Ami Sector One, Dream 17 and Factor 5.
There is a wide range of excellent Amiga software you can have for free, but you can’t run any of it without Kickstart, the Amiga’s firmware and bootloader. Because this is still under copyright, it’s not included in Amiberry and you have to provide it yourself.
Kickstart was released in a range of versions. The most important version of Kickstart to have to is 1.3, which allows you to emulate the Amiga 500.
The easiest way to get it is from Amiga Forever where Cloanta, the rights holders, are quite happy to sell you one cheaply. All of these options include Kickstart 1.3.
If you have an Android phone and are handy enough to extract files from your device, you can get it even cheaper, by purchasing Amiga Forever Essentials from the Play store.
If you look hard enough you will also find websites that let you just download Kickstart, no questions asked. Steer very clear of these. We aren’t lawyers in your jurisdiction, but you may well be engaging in software piracy to download these without a license.
Once you’ve found a copy of Kickstart, installing Amiberry is just a matter of installing dependencies and then downloading an executable.
First, update Raspberry Pi OS with this command:
sudo apt update && sudo apt upgrade -y
Now install the dependencies:
sudo apt install libsdl2-2.0-0 libsdl2-ttf-2.0-0 libsdl2-image-2.0-0 libxml2 flac mpg123 libmpeg2-4 -y
Now go and get the binary from the releases page. You’ll notice there are different versions for each version of Raspberry Pi.
You also choose between versions that interact with the SDL2 layer and dispmanx. The dispmanx version operates at a lower level and so should offer better performance, but they both do basically the same thing.
Download the correct binary for your project, then expand it into your /home/pi/ directory.
This creates a directory name that is quite long and annoying to type; I think it’s a good idea to rename the directory to something shorter. Unless you plan to install multiple Amiga emulators on this device, you can just call it ‘amiga’.
On Linux, we use the mv command to move and rename files, like this:
mv ~/amiberry-rpi3-dmx-32bit ~/amiga
Your directory name will be slightly different, depending on the binary you extracted.
Now copy your Kickstarts to ~/Amiga/kickstarts/ and if you purchased them from Amiga Forever, copy the “rom.key” file here as well.
It’s best to exit from the desktop environment before running Amiberry. It will still launch from a terminal window, but it interferes with the mouse.
Browse to the Amiga directory and launch Amiberry:
cd ~/amiga
./amiberry
You’ll see something like this below,
There’s a lot to configure, right? Well, you can if you want. If you look at these Quickstart settings, you’ll see that the Amiga 500 is already selected, and immediately below are two floppy disk drives. All we need to do is select some floppy disk images and press start.

You might also want to tweak the display settings. For some reason, on my setup, the default display settings cut the left side of the screen off. Have a play and see what works for you.
This screen isn’t just how we launch the emulator. You can use it to switch disks, edit the display settings, restart or exit Amiberry. Return here any time by pressing F12. Don’t worry about F12 conflicting with anything you want to do in the software; the Amiga’s function keys stopped at F10.

So, what was that we were saying about floppy disk images?
Well, back in the day, pretty much all Amiga software was sold, stored and distributed on floppy disks. It was quite normal for Amigas to have no hard disk at all!
Now, almost nobody has real floppy drives connected to their Raspberry Pi, so Amiberry emulates them in software. We load as disk images, which usually have .adf, .ipf or .dms extensions.
Let’s do this by running Desert Dream, a classic Amiga demo from 1993.
Download both disk images from this link and save them to your Amiga folder. Then launch Amiberry again and select these disk images on the Quickstart screen, like this:
Now click start and have a look at what a few Danish kids, in their spare time, could program a 30-year old computer to do.
Backwards compatibility was quite patchy on the Amiga, which is why we’re often most interested in emulating the Amiga 500.
But what was going on with later, more powerful machines?
• More powerful CPU: The Motorola 68000 on the early models was succeeded by the 68020, 68030, 68040 and eventually the 68060, each offering faster clock speeds and many times more transistors.
• More powerful co-processors: The Original Chip Set, or OCS co-processors were first replaced by the Enhanced Chip Set, or ECS co-processors, and finally by the Advanced Graphic Architecture, or AGA co-processors.
• Newer versions of Kickstart: As the hardware developed, so did the firmware to run it.
• More RAM: The Amiga 4000 came with a whole megabyte of RAM in the base configuration, expandable up to a whopping 16 megabytes
As well as being released in about a dozen different models, it was possible to upgrade them in all sorts of ways too. The total number of possible hardware configurations is far more than you would probably be bothered to count
Amiberry lets you delve as far as you like into this, or you can just stick to the base configurations in the Quickstart menu.
Now let’s have a play with an Amiga 1200, which used the AGA co-processors.
We’ll use this to play Alien Breed: 3D. This is one of the earliest first-person shooter games.
To run this, you will need a copy of Kickstart 3.1 in your kickstarts folder. Fetch the disk images from this link here and then extract them to your Amiga folder and launch Amiberry.
Now, select the Amiga 1200 in the Quickstart menu, and boot just the first disk for the floppy drive, like this:

Now start the emulation and click through until you see this screen telling you to load the second disk. (We had to do this a lot in the old days!)

Press F12 to return to the emulator settings and switch disk 1 for disk 2, like this:
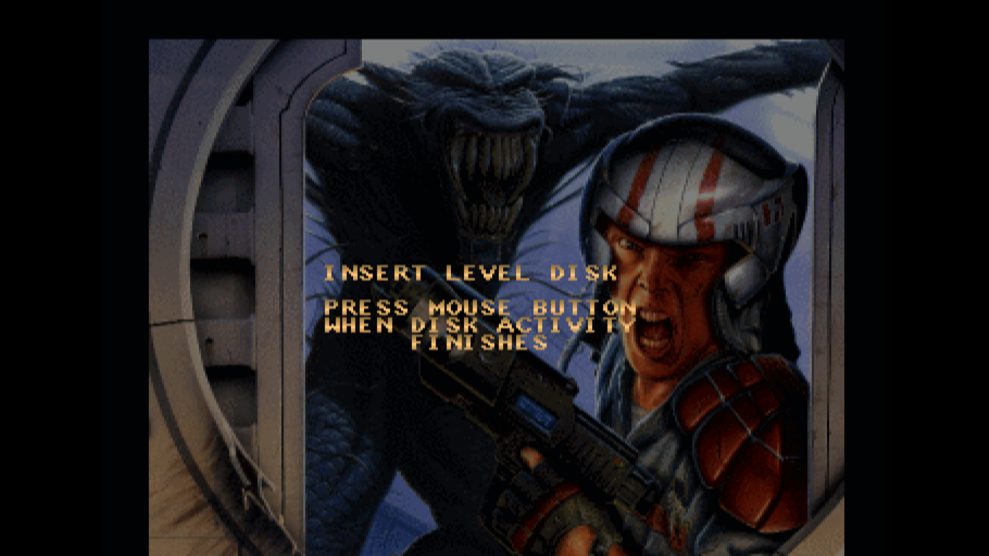
Press resume and click the mouse button. Now you’re playing Alien Breed: 3D!
Amiberry is a very good emulator, but it’s not 100% perfect.
If something doesn’t run, have a play with the settings and with the order you use to load the disks. Don’t feel too discouraged if some programs don’t work, no matter what you try. There’s plenty more out there to play with.
There are even new games and demos in development today.


