![]()
If you’ve written any code at all for the Raspberry Pi’s GPIO pins, there’s a good chance you used Python and the GPIO Zero Module. That’s because it’s the easiest way to get started.
But just because this module is easy, doesn’t mean it lacks flexibility or power.
GPIO Zero isn’t a replacement for previous Python modules handling GPIO on the Raspberry Pi. It works as a layer on top of them.
GPIO uses RPi.GPIO for most operations, with PiGPIO and RPIO in the mix too.
Because GPIO Zero sorts out so many little details for you, your project needs very few lines of code.
Check it out:
pir = MotionSensor(4)
pir.when_motion = myFunction
That first command says that there’s a motion sensor on pin 4, and then the second sets a function to run when the sensor pulses. Seriously simple, right?
GPIO Zero works by offering a range of classes configured for many common components you might connect to your GPIO pins. You use these classes to create objects tied to specific components wired to the GPIO pins.
The classes that should most interest you at first will be the input classes and output classes, which cover a range of standard input and output components.
There’s more beyond this, like SPI classes to stream data to other components, and even base and generic classes you could use to develop classes of your own. Don’t worry about that too much just yet; it’s just good to know it’s there.
GPIO Zero is already installed on the standard Raspbian image. If you’re using Raspbian Lite, or a more exotic Linux, you will need to install it.
You can import the whole module into Python with:
import gpiozero
You can then access classes by prefixing them with “gpiozero.”, like this:
button = gpiozero.Button(11)
greenLED = gpiozero.LED(13)
pir = gpiozero.MotionSensor(15)
It tends to be more convenient just to import the classes you need for the specific components you’re using.
from gpiozero import Button, LED, MotionSensor
You then refer to these classes without the prefix, like this:
button = Button(11)
greenLED = LED(13)
pir = MotionSensor(15)
Your code is then less cluttered with redundant information, making it more readable.
Let’s explore how simple GPIO Zero can be by wiring a button to a GPIO pin, to play a series of tones on a piezo buzzer.
For this, you’ll need:
| A Raspberry Pi with power supply and an SD card with Raspbian installed |  |
| A breadboard |  |
| A GPIO extension board |  |
You’ll also need a piezo buzzer, pushdown switch, a few jumper cables, and some way of typing into your Raspberry Pi, such as an SSH connection or a USB keyboard and mouse. Ready? Let’s go.
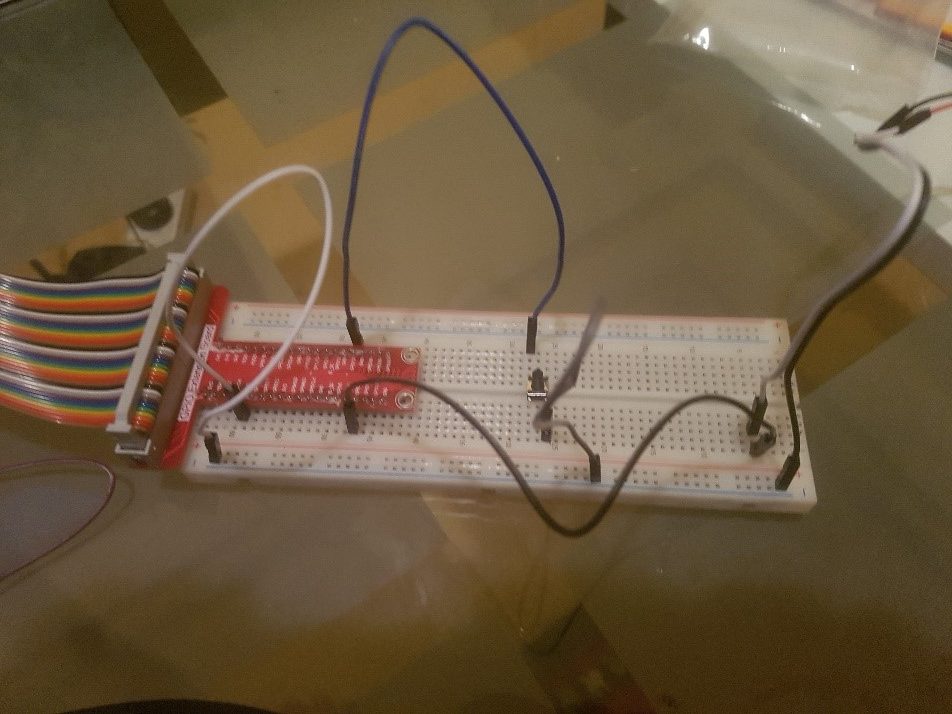
If your GPIO extension board isn’t already connected to your Raspberry Pi and your breadboard, plug them together. Then connect a ground pin to the negative power rail.
Your piezo buzzer should have a red and a black wire coming out of it. The red wire connects to a positive voltage, which will come from a GPIO pin, while the black wire connects to ground.

I use jumper cables to connect my buzzer to my breadboard, but you can just plug it straight in if you’d prefer. Connect the buzzer’s black lead to the negative power rail, and the red lead somewhere in the middle of the breadboard.
Now, connect this row of the breadboard to a GPIO pin. I’m using pin 13.
For that, let’s open up the Python interpreter. Type:
python3
Now, we need to import a class for a piezo buzzer and use it to create an object. There are actually two classes; Buzzer, which only does a simple beep, and TonalBuzzer, which lets you vary the pitch.
We’re going to want to play a few different tones, so let’s import TonalBuzzer and set it to pin 13.
from gpiozero import TonalBuzzer
piezo = TonalBuzzer(13)
If everything is hooked up properly, it will squeal when you type:
piezo.play(‘A4’)
This will continue until you tell it to stop, like this:
piezo.stop()
You can play other notes too! Try these:
piezo.play(‘C4’)
piezo.play(‘D4’)
piezo.play(‘E4’)
Now let’s put all this together into a function to make beeps at different pitches. We’ll start by grabbing the sleep function from the time module so that it doesn’t go too fast to hear it.
from time import sleep
Now let’s put together a simple function that plays a single beep of a certain pitch for one second. Remember that Python is fussy about indentation.
def playTone(pitch):
piezo.play(pitch)
sleep(1)
piezo.stop()
Press enter again so that Python knows you’ve finished writing the function. It’s also a good idea to just check that it works.
playTone(‘A4’)
playTone(‘C4’)
These should each play a short beep at a different pitch. If it doesn’t, check that you typed everything correctly.
Now we can write another quick function that beeps three times at different pitches.
def playTones():
playTone(‘A4’)
playTone(‘D4’)
playTone(‘E4’)
Press enter again to finish the function, then check that it works.
playTones()
All working? Excellent.
All that’s left to do now is wire up a button and program it to play this function.
Place the button on the breadboard, straddling the center trench.
Then use jumper cables to connect one corner of the button to the negative power rail, and the diagonally opposite corner to a GPIO pin. I’m using pin 12.
Now let’s import the Button class from GPIO Zero, and set it to pin 12:
from gpiozero import Button
button = Button(12)
All that’s left to do now is to tell it to run our function when the button is pressed.
button.when_pressed = playTones
Now press the button. If you’ve done everything correctly, it should play the tones.
GPIO Zero Makes Everything Simple
Wasn’t that easy? We configured that button with just three lines of code.
Despite appearances, there’s actually quite a bit going on under the hood here: pull up and pull down resistors and active high and low signals. The different pitched tones are generated using a technique called “pulse width modulation,” where the pin flickers on and off really fast to simulate an analog voltage. GPIO Zero has all of this preconfigured.
You can start picking up all these things when you’re ready.
In the meantime, enjoy building and learning with GPIO Zero!
 Using Raspberry Pi GPIO Pins With the RPi.GPIO Python Library
 How to Run Arduino Sketches on Raspberry Pi
 Reading Temperature, Humidity, and Pressure with AE-BME280 and Raspberry Pi
 Raspberry Pi Camera: Mini Fixed Point Camera Using Raspberry Pi Zero V1.3 & Camera Module
 Tweet on Raspberry Pi via Twython! (Part 1)


