![]()

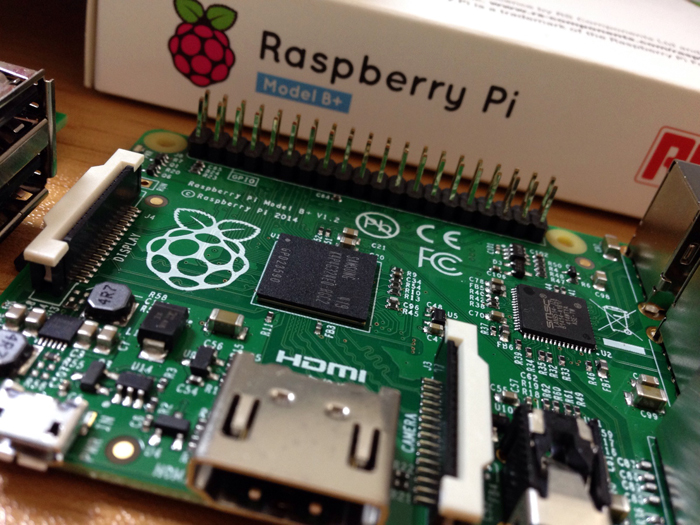
Recently, I got the Raspberry Pi Model B+! It has undergone significant upgrade, even in its appearance!
This time, while comparing the differences from the previously used “Model B,” I hope to facilitate the installation. Since this is not enough fun, we will also attempt to connect it to the Wi-Fi, which has been difficult due to USB port shortage!
Model B+ | Raspberry Pi Official Website

First, let’s look at them from the top. The one on the left is “Model B” and the one on the right is “Model B+.”
The board has been reorganized, and it appears to be cleaner. The connectors, with wires sticking out, are gathered on the right and the bottom sides, so it should reduced the risk of getting cords getting tangled like before.
An obvious difference is that the yellow video port and the blue audio port are gone. Instead, there are more black ports.
Personally, it feels easier to carry because of the rounded corners. The image of a raspberry on the board is more pronounced and cuter (as a girl, this is important!).

Next, let’s look at it from the side. This is the front side.
The orientation of the microUSB port for the power source has changed.
A black port next to the HDMI has been added. Instead of the composite port, the video output has been combined with the audio port. It says on the official website that the audio output quality has been improved. That makes me want to try an electronic kit that makes sounds!

On the right side.
USB ports have been increased to 4! This is the best change! The energy saving design allows for the use of the USB to power the Raspberry Pi. Now, it is possible to use accessories other than a mouse and a keyboard!
They have been added to where the LEDs were before, where have the LEDs gone?

This is the back side.
The GPIO port has been elongated! The number of pins has increased from 26 to 40. If the pin number has been increased, does that mean it has an increased functional capacity (I would like to pursue this area further next time!)?

On the left side.
In the Model B, the microUSB port for power was on this side. However, it has been moved to the front side, leaving this side completely empty.
I found the LEDs on this side! The 5 LEDs on the Model B have been reduced to 2 in the Model B+, “ACT” and “PWR.”

This is the back side. The SD card slot has been changed with microSD card slot. I am slightly disappointed since I was hoping to use the SD card that I was using on the Model B right on the Model B+. It was not that easy!
The slot has been trimmed. Now, it is more stable when placed flat. The card is removed by pushing on it, instead of pulling it. When the card was inserted in the Model B, more than half of it was sticking out. That has been modified to the point where it is no longer a nuisance. It reduces the risk of causing physical damage!
Let’s start the installation process with what I remember from last time! It should go smoothly since this is the second time?! If I encounter a problem, I will review my past articles for reference.
Download NOOBS from the official website. The current version is “Ver. 1.4.2.”
Reformat microSD using the “SDFormatter” and copy NOOBS. I was able to use the SD card reader I had since it was compatible with miniSD!
Connect the SD card, a mouse, a keyboard, and a display directly to the Raspberry Pi and turn on the power. The installation will begin automatically.

Select “Raspbian” and click on “Install” to begin the installation. This time, the installation took about 30 minutes.
Once the installation is completed, the blue settings screen comes up.
Once back at the command line, start the OS!
|
1 |
startx |

The desktop is up!
Let’s change the passwords for the default “pi” user and the “root” user with the administrator access. Start the LX Terminal and enter the following command.
|
1 2 |
sudo passwd pi sudo passwd root |
The password change is complete when the new password is entered twice.
Start the LX Terminal and enter the command. First, obtain the newest package list.
|
1 2 |
sudo apt-get update sudo apt-get upgrade |
After it is done, install “ksnapshot,” the package with screenshot function.
|
1 |
sudo apt-get install ksnapshot |
Let’s install Samba to make data exchange easier!
|
1 |
sudo apt-get install samba |
Refer to this article for changing the settings file.
It took over 2 hours up to this point. It feels like the process took longer than it did for the Model B. Perhaps, it is due to the miniSD card. A 8GB card was used for both installation, so there might be an issue of compatibility.
Well, that was not enough fun. Since the number of USB ports increased to 4, let’s try adding another part now!
I couldn’t connect the Model B to the wifi as it only have 2 USB ports.
A Wi-Fi adaptor with USB connection is needed. Here, I used an adaptor that is normally used on a Windows machine. Therefore, there is no need to check if it is working. Let’s place this in a USB port on the Raspberry Pi.
When ready, open “WIFI Config” software on Raspberry Pi. There is an icon on the desktop already since it is pre-installed!

This icon! If you are unable to locate it, select “wpa gui” from the “Internet” on the Start menu.

This is the initial screen.
Click “Scan” on the lower right for a display of the list of wireless networks.

Double click on the SSID of the desired network.
The list will automatically refresh every few seconds. It was hard to catch the one I wanted since I was working in a place with numerous wireless networks.

When the network is selected, a setting screen is displayed!
Enter the password in the “PSK” area and click “Add.” That is it!

Once the registration is complete, it goes back to the initial screen.
Click “Connect” on the lower left side for the connection information you just entered.
Once the “Status” becomes “Completed,” the connection is established.
Open a browser, and try accessing an external site to check the connection! It was so easy! Now I can remove the LAN cable, and the Raspberry Pi unit looks cleaner.
The second batch of Raspberry Pi was deliciously (?) baked!
In the process, I was also able to review my previous 7 articles, and it was killing 2 birds with 1 stone! Since it was the second time, I was able to go through the process much more smoothly, and I felt more confident!
Since I am becoming more familiar with manipulating the inside of Raspberry Pi, I would like to try construction. Parts are needed for construction! I consulted my boss about this, and he got me some parts!

In the next article, I will try electronics kit construction! Where does this cable go? What is this white board? That is where I will begin. The road seems awfully long…
First, I would like to light a LED! The goal is to make a LED twinkle!
 Raspberry Pi DIY Case & Overview the Preinstalled Softwares
 Raspberry Pi Camera: Mini Fixed Point Camera Using Raspberry Pi Zero V1.3 & Camera Module
 Raspberry Pi – Preparation
 Creating an AirPlay Network Audio Player with Volumio
 Setting Up Raspberry Pi as a Home Media Server