![]()

Now that we have finally programmed the Raspberry Pi to make sounds, lets try our hand at the long-sought internet radio receiver!
This time, we will also try to operate the Raspberry Pi remotely.
Internet Radio – Wikipedia
Internet radio (also web radio, net radio, streaming radio, e-radio, online radio, webcasting) is an audio service transmitted via the Internet. Broadcasting on the Internet is usually referred to as webcasting since it is not transmitted broadly through wireless means.
One of the main advantages of Internet radio is that you can listen not only to domestic radio stations but also to international ones! The recent development of smartphone apps has made Internet radio even more convenient (I often listen to music programs and local FM stations!).
There are different methods of receiving internet radio. But this time, I will show you to use SHOUTcast aggregator with MPlayer package.
MPlayer – Wikipedia
MPlayer is a free software and open source media player. The program is available for all major operating systems, including Linux, Mac OS X and other Unix-like systems, as well as for Microsoft Windows.
Many different media formats are supported! This convenient package can not only play audio but also video files. In fact, most media files can be played with MPlayer!
Official Website
Perform the installation using the normal commands in the LX Terminal.
Using the option “-h” displays an overview of the options and key commands. Doing this in the beginning to get an idea of the operating procedures will help you to move smoothly through this tutorial.
|
1 2 |
apt-get install mplayer mplayer -h |

Figure 1
First, before trying to receive audio over the internet, let’s carry out a test using an MP3 file! The settings for the options are displayed in the overview mentioned above. The format is the same as with the mpg321 player we used in the previous tutorial, so it should be easy to use.
|
1 |
mplayer /root/Holst-Planets-Jupiter.mp3 |

Figure 2
We just played an MP3!
When played successfully, the console will display the file information as you see here (the Japanese song title and artist are garbled due to the language encoding…). If you execute a key command while the file is playing, the resulting operations will be displayed in the console so you can tell if the code is working correctly.
Now, to play a radio program in SHOUTcast, specify an URL after the option “-playlist”.
You can obtain the URL from the links to the SHOUTcast playlists on their website.

Figure 3
Make sure that the url matches that of the download icon, as shown in the figure. The URLs are all identical up to the id “http://yp.shoutcast.com/sbin/tunin-station.pls?id=…”. So, all you have to do is check the ID number at the end.
|
1 |
mplayer -playlist http://yp.shoutcast.com/sbin/tunein-station.pls?id=172098 |
Here are the commands. If you run them you will get:

Figure 4
It’s a success! The radio information are now displayed in the console!
In contrast to an MP3 file, an Internet radio station will keep playing indefinitely. To end the playback, you need to press “Q” or the escape key.
Rather than entering the commands each time into the Raspberry Pi, it would be more convenient to do this from a smartphone or computer. For this reason, I will show you how to access the Raspberry Pi remotely to play audio.
First, I will be using Apache to set up a web server and PHP to send the commands. Install each package and restart the Raspberry Pi.
|
1 2 |
apt-get install apache2 php5 reboot |
Now, to allow you to access the Raspberry Pi remotely, find the IP address that has been assigned to it. In certain software environments, you can simply use the network name in a url such as “http://raspberrypi/”. However, using the IP address is more reliable. (For example, I was unable to use the first method with the Safari browser on the iPhone.)
To find the IP address, use the command “ip” with the option “a”.
You can also do this with the command “ipconfig”, but because this command has not been maintained for a long time, it is now deprecated.
|
1 |
ip a |

Figure 5
You should see similar results as above. In this case, the IP address of the Raspberry Pi is 192.168.0.14.
Now that you know the IP address, let’s try accessing it from a browser on a separate computer!

Figure 6
Here is the result of accessing the url “http://192.168.0.14/” from a Windows computer on the same network.
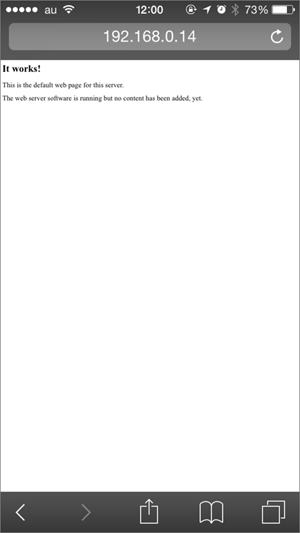
Figure 7
And here are the results from a smartphone (iPhone 5). I was able to access it without any problems!
By default, the initial screen displays the file “/var/www/index.html” in the Apache directory.
Place the program containing the commands in this folder. This time it is a simple program that plays audio files using MPlayer (index.html has been replaced in this case with index.php).
/var/www/index.php
|
1 |
<?php exec("mplayer /root/Holst-Planets-Jupiter.mp3"); |
Now, let’s try accessing the Raspberry Pi from an external device! Music should start to flow from the Raspberry Pi’s speakers!
If you experience any errors this could be due to limits in Apache’s authorization. You should check the details of the error, which are logged in the directory “/var/log/apache2/error.log”.
In my software environment, re-installing the latest Apache2 package and adding the default username “www-data” to the “audio” group succeeded in fixing any bugs
|
1 |
usermod -G www-data,audio www-data |
Next, let’s play Internet radio! I replaced the path for the MP3 file with the URL of the SHOUTcast playlist. Make sure to not forget to add the option “-playlist”.
/var/www/index.php
|
1 2 |
<?php exec("mplayer -playlist http://yp.shoutcast.com/sbin/tunein-station.pls?id=172098"); |
It plays successfuly!
This is what I would like to say. But unfortunately we have no way to stop the audio from playing (or loading)!
First, we need to find a way to stop the audio.
The command “kill” will stop a program according to its process ID. While the command “killall” will stop all programs with a given process name.
First, I tried using the “kill” command. Use the “ps” command to find the process ID.
|
1 |
ps -A | grep 'mplayer' |

Figure 8
|
1 |
kill 3029 |
Running the command turned off the audio! Phew!
I also tried using the “killall” command. In this case you simply need to add the process name “mplayer” to the function.
|
1 |
killall mplayer |
This worked as well!
Although the idea of turning off all processes with the same name seems a little scary, in this case there is no need to have multiple MPlayer processes, so there shouldn’t be any problems.
Here is an edited version of the PHP code based on the discussion above.
/var/www/index.php
|
1 2 3 4 5 6 7 8 9 10 11 12 13 14 15 16 17 18 19 20 21 22 23 24 25 26 |
<?php if(isset($_GET['id'])){ $id = $_GET['id']; if($id=="stop"){ exec("killall mplayer"); }else{ exec("killall mplayer"); exec("mplayer -playlist http://yp.shoutcast.com/sbin/tunein-station.pls?id=" .$id. " > /dev/null &"); } } ?> <html> <head> <meta name="viewport" content="width=device-width"> </head> <body> <p><a href="index.php?id=stop">stop</a></p> <ul> <li><a href="index.php?id=172098">SmoothJazz.com Global Radio</a></li> <li><a href="index.php?id=709809">ABC Lounge</a></li> <li><a href="index.php?id=209680">ABC Jazz</a></li> <li><a href="index.php?id=190282">Jazzradio</a></li> <li><a href="index.php?id=98600" >TheJazzGroove.com</a></li> </ul> </body> </html> |

Figure 9
This is how it looks from a smartphone (I tweaked the page with some CSS)!
Clicking the name of the radio program starts the audio playback. Because it is first necessary to stop playback when you want to play a different program, I use the “killall” command to reset MPlayer.

Picture 1
I’m now using this program to play background music through speakers at my company! This has lead to a daily competition over who gets to set the channel using their smartphones as a remote control.
The internet radio receiver is a done!
The long-sought-after Raspberry Radio is now completed. The fact that code can be used to control it means that there is a huge scope of customization! You can have fun upgrading the code by adding the ability to register new radio programs or by improving the design.
But… I want to make the code even more convenient!
I did some research with this in mind, and it turns out that you can also control the Raspberry Pi with a smartphone app!? This sounds intriguing!
As a result, we now move on to Part 2 of the Raspberry Pi Radio!
 Raspberry Radio Part 2 – Using MPD and a smartphone app to turn your Pi into an easy to use radio!
 Setting Up Raspberry Pi as a Home Media Server
 Audio programming with Sonic Pi!
 DIY Raspberry Pi Drone: Mechanics – Part 1
 An Introduction to Raspberry Pi GPIO Pins
 How to Use a Raspberry Pi as a VPN Server


